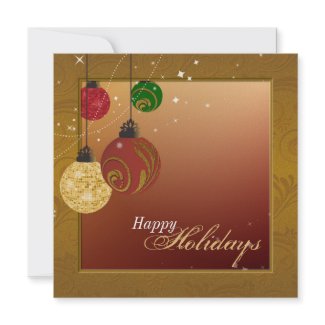
Happy Holiday's Party Invitation by Pam's Designs
I had so much fun creating this design. It incorporated a ton of cool design tricks that I wasn't aware of. I discovered the rotate 3D feature in illustrator, which helped me to create the Christmas bulbs. It was really neat. You just take a paper, such as the disco ball paper and wrap it around the 3 dimensional sphere. Or in the case of the red bulb with the gold swirl design, I wrapped a red to black gradient around the sphere, then created another sphere with the gold swirl design and put it on top of the gradient sphere.
The stars were created with a splatter brush. I first created my star with the star tool, then made it into a splatter brush. Then, when you brush along a path, the stars spread all along your path. The same goes for the dotted lines.
I am by no means an expert with Illustrator, so I used Gimp to put my design together, I used gradients for the background with the Soft Light feature to get an array of gradient colours in different locations (you can see this more on some of my other designs in the holiday shoppe (Pam's Designs). The border was done by putting a swirled design paper overtop of a gold bilinear gradient and using some transparency. Then, I added noise to get a sparkle effect. One of my favourite features in Gimp is the Add Bevel feature, which pops up your design, giving it a three dimensional look. Then, I fuzzy select the frame and add a drop shadow (+12, +12) in black and (-12, -12) in white. Then I delete any parts of the shadow that don't belong and give them a bit more transparency to give that double layer effect on the inside of the frame. It's amazing how much time goes into a design. This was an all day adventure.

No comments:
Post a Comment